Channels
How to create a WebChat Channel
A WebChat Channel is the chat window on your own website. Creating it in BotableX takes two minutes. Putting it on your website is a small job for your web developer, and this article gives you everything to hand...
Updated October 4, 2026. Applies to the BotableX Staff Portal. For tenant admins.
A WebChat Channel is the chat window on your own website. Creating it in BotableX takes two minutes. Putting it on your website is a small job for your web developer, and this article gives you everything to hand over to them.
This article shows how to create the Channel, how to choose the way customers are identified, and where to find the connection details for your website.
Before you start
- You need the Bots permission (
bots.manage). - Know the web addresses the chat window will sit on, for example
https://www.example.com. - Decide whether customers chat anonymously or are recognized (by email, phone or your own customer id). You can change this later, but changing it means changing your website code too.
- Know who your web developer is. The last part of this article is for them.
So how do you create a WebChat Channel?
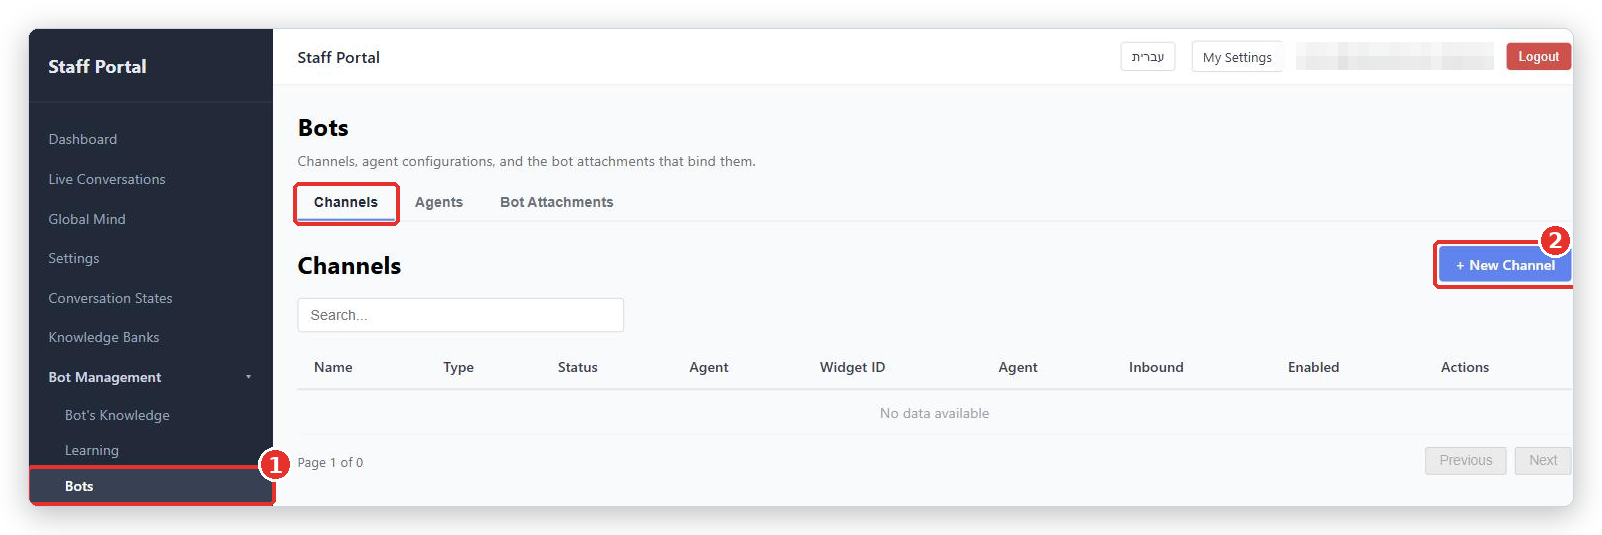
- In the menu on the left, open Bot Management and click Bots. Make sure the Channels tab is selected.
- Click + New Channel.
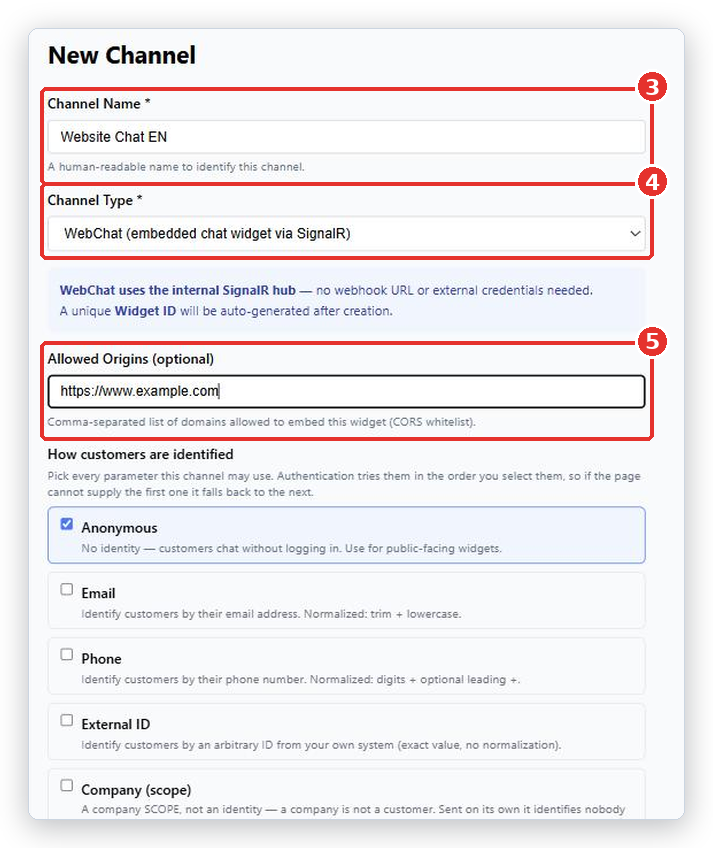
- In Channel Name, type a name you will recognize, such as
Website Chat EN. - Leave Channel Type as WebChat (embedded chat widget via SignalR). It is already chosen.
- In Allowed Origins (optional), type the web addresses that may show this chat window, separated by commas. For example
https://www.example.com, https://app.example.com. Include thehttps://.
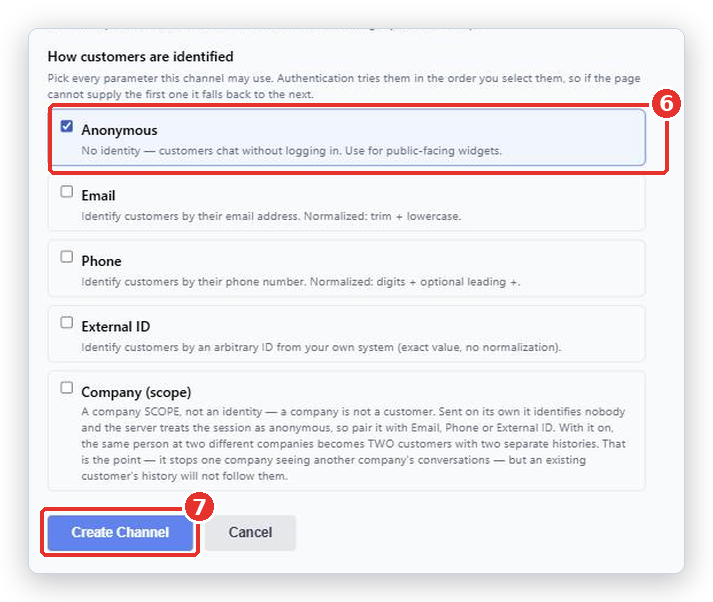
- Under How customers are identified, tick the ways you want to recognize a customer. For a public website, tick Anonymous. The choices are explained below.
- Click Create Channel.
How customers are identified
This decides what BotableX knows about the person chatting. You can tick more than one. The order you tick them matters: BotableX tries the first one, and if your page cannot supply it, falls back to the next.
| Choice | What it means |
|---|---|
| Anonymous | No identity at all. The customer just starts chatting. Use this for a public website. Cannot be combined with anything else. |
| The customer is known by their email address. | |
| Phone | The customer is known by their phone number. |
| External ID | The customer is known by an id from your own system. You must also fill in CRM property holding this ID, for example customer_number. |
| Company (scope) | A company, not a person. On its own it identifies nobody, so tick it together with Email, Phone or External ID. |
If you tick anything other than Anonymous, a box called Require identity verification appears. Tick it. Without it, any web page could claim to be any customer.
What you see after you click Create Channel
You land on the Channel page, headed Channel Created Successfully. Nothing is on your website yet. This page holds everything your web developer needs.
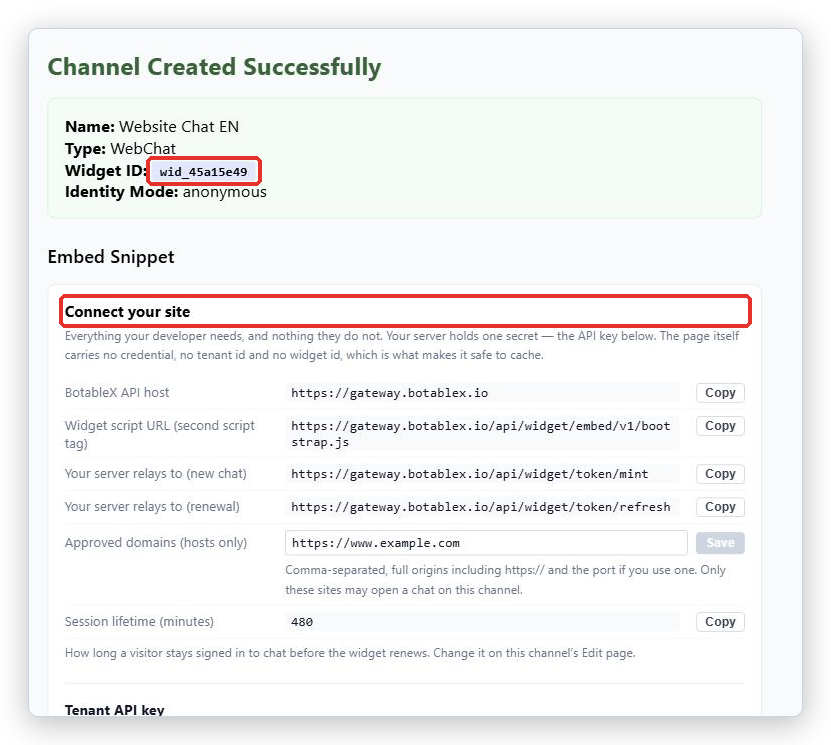
- Widget ID identifies this chat window. You may be asked for it by support.
- Connect your site lists the addresses your developer’s code talks to. Each one has a Copy button.
- Approved domains (hosts only) repeats the web addresses you allowed. You can change them here and press Save.
- Session lifetime (minutes) is how long a visitor stays signed in to the chat. The default is
480(8 hours).
Getting the chat window onto your website
This part needs your web developer. It is not a copy-and-paste snippet: your website needs two small pieces of code on the page and two tiny “relay” endpoints on your server. Any web language can do it, and the guide linked below explains it step by step.
Important. The API key is the only secret in this setup. It is shown once, when you issue it. Store it in your website’s secrets, never in the page itself. Anyone holding it can open a chat as any of your customers.
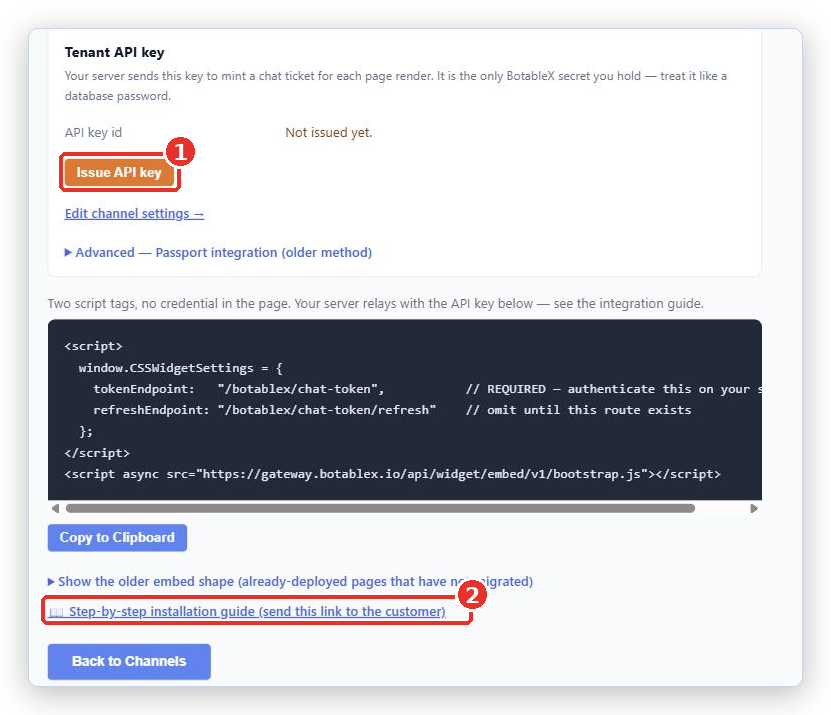
- On the Channel page, scroll to Tenant API key and click Issue API key. Copy the key straight away and hand it to your developer over a safe channel. You will not see it again.
- Send your developer the link Step-by-step installation guide (send this link to the customer), at the bottom of the same page.
- Your developer follows the guide: two script tags on the page, two relay endpoints on your server, and the Approved domains must match your real website address.
- Load your website and check the chat bubble appears.
What happens next
The chat window will appear on your site, but nothing will answer yet. Create an Agent, then a Bot Attachment joining that Agent to this Channel, and make it active. Only then does the bot reply.
Common problems
| Problem | What to do |
|---|---|
| The chat window does not appear on my site | Check that your web address is listed under Approved domains, exactly, including https://. Check the page is served over https:// and that the two script tags are on it. If nothing at all shows and the browser console is empty, the spelling CSSWidgetSettings in the page code is wrong. |
| Choose at least one way to identify customers. | You did not tick anything under How customers are identified. Tick at least Anonymous. |
| Anonymous means no identity at all, so it cannot be combined with another parameter. | Untick Anonymous, or untick everything else. |
| A CRM property name is required when External ID is selected | Fill in CRM property holding this ID with the property name from your CRM, for example customer_number. |
| Use lowercase letters, digits and underscores only, starting with a letter | The CRM property name has a capital letter, a space or a dash in it. Use the exact internal name from your CRM, not the label you see on screen. |
| I lost the API key | It cannot be shown again. Open the Channel page and issue a new one, then give the new key to your developer. |
| The window appears but nothing answers | There is no active Bot Attachment on this Channel. See the article on attaching a Bot. |
Tip from the BotableX team. Create the Channel with Anonymous first and get the chat bubble showing on a test page. Switch to recognized customers only after that works. Two changes at once are twice as hard to debug.